Data Models
Models in Retabler serve as templates that define the structure of the data to be imported. By creating a model, admins create the blueprint for the data they want to import, specifying the columns and data types that will be used to organize and validate the data.
For each of the models created, Retabler provides a dedicated data importing page, where users can import data from a file into the model. The user can select the file, map the columns, and import the data. Additionally, Retabler provides a data importing widget, a small component that can be embedded in any web page, allowing users to import data from a file into a model.
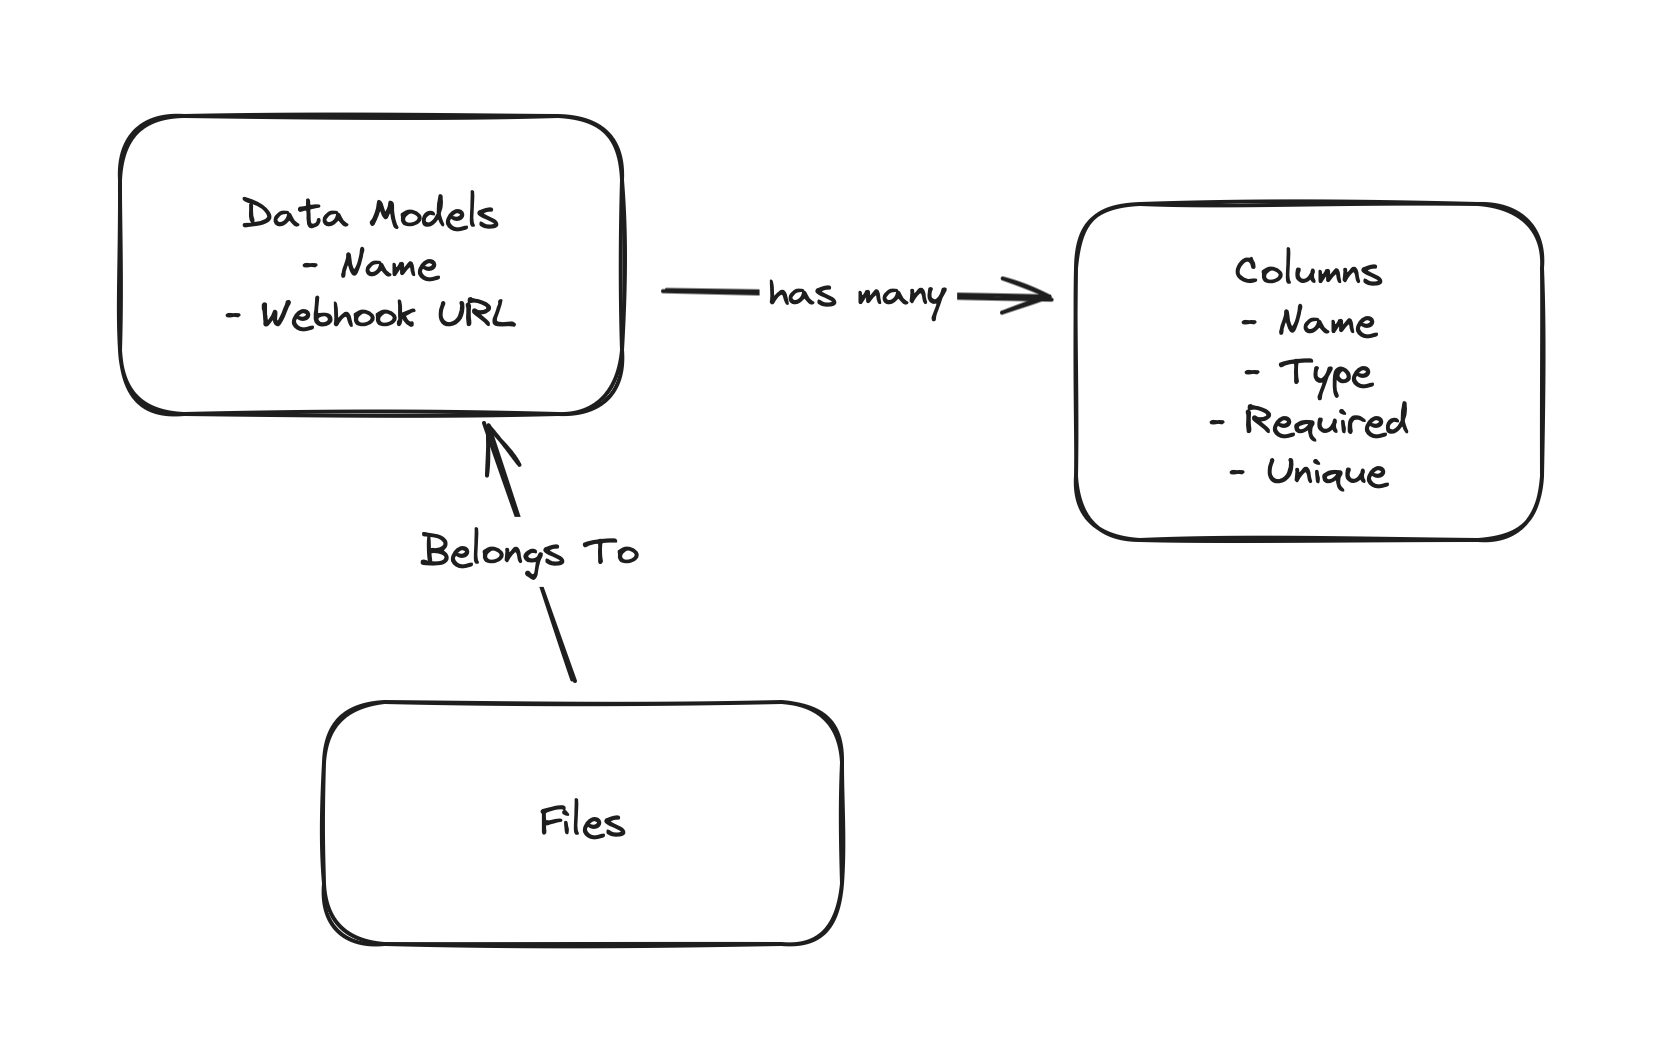
A model is composed by the following elements:
Model Name #
This name will be used to identify the model across the admin portal, use a descriptive and unique name for your model, this will avoid confusion and make it easier to manage the data.
Webhook URL #
The webhook URL is used to send the clean data after the import process has been successful, your system can then use this data to process it further or store it in your application database.
Column Definitions #
This is probably the most delicate part of the model, in here admins define the columns and data types that will be used to organize and validate the data.
Creating a model #
Within a Retabler account admins can define as many models as needed to accommodate the various types of data they want to import. To create a model, follow these steps:
- Log in to your Retabler account.
- Navigate to the "Models" section in the dashboard.
- Click on the "Create New Model" button.
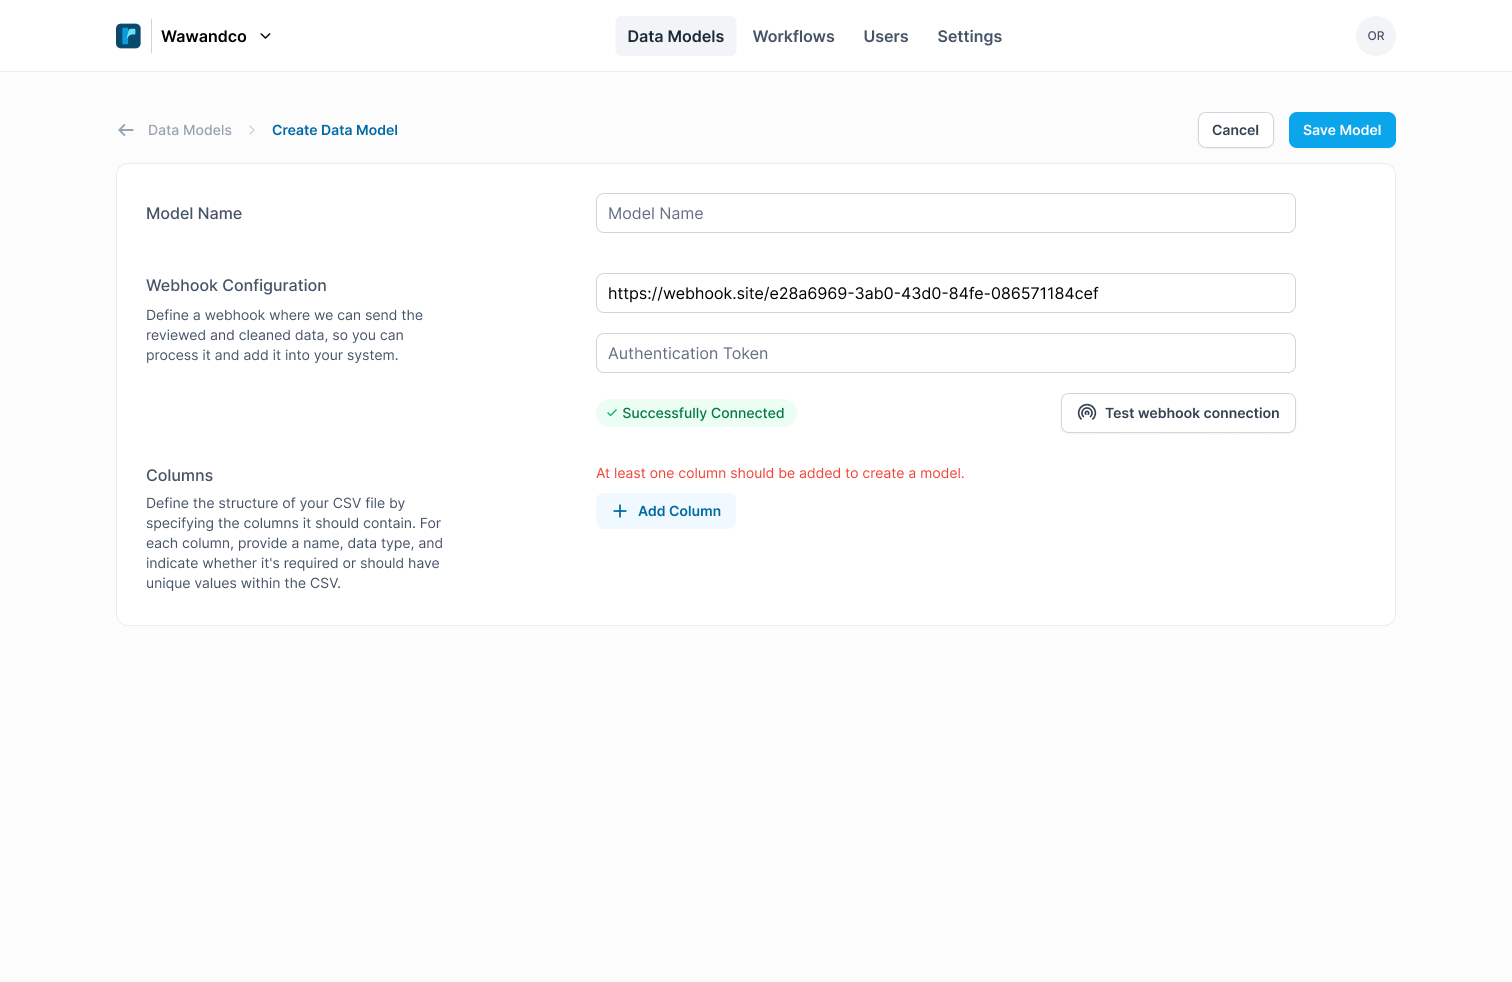
Once there you will be presented with a form to fill in the details of the model.
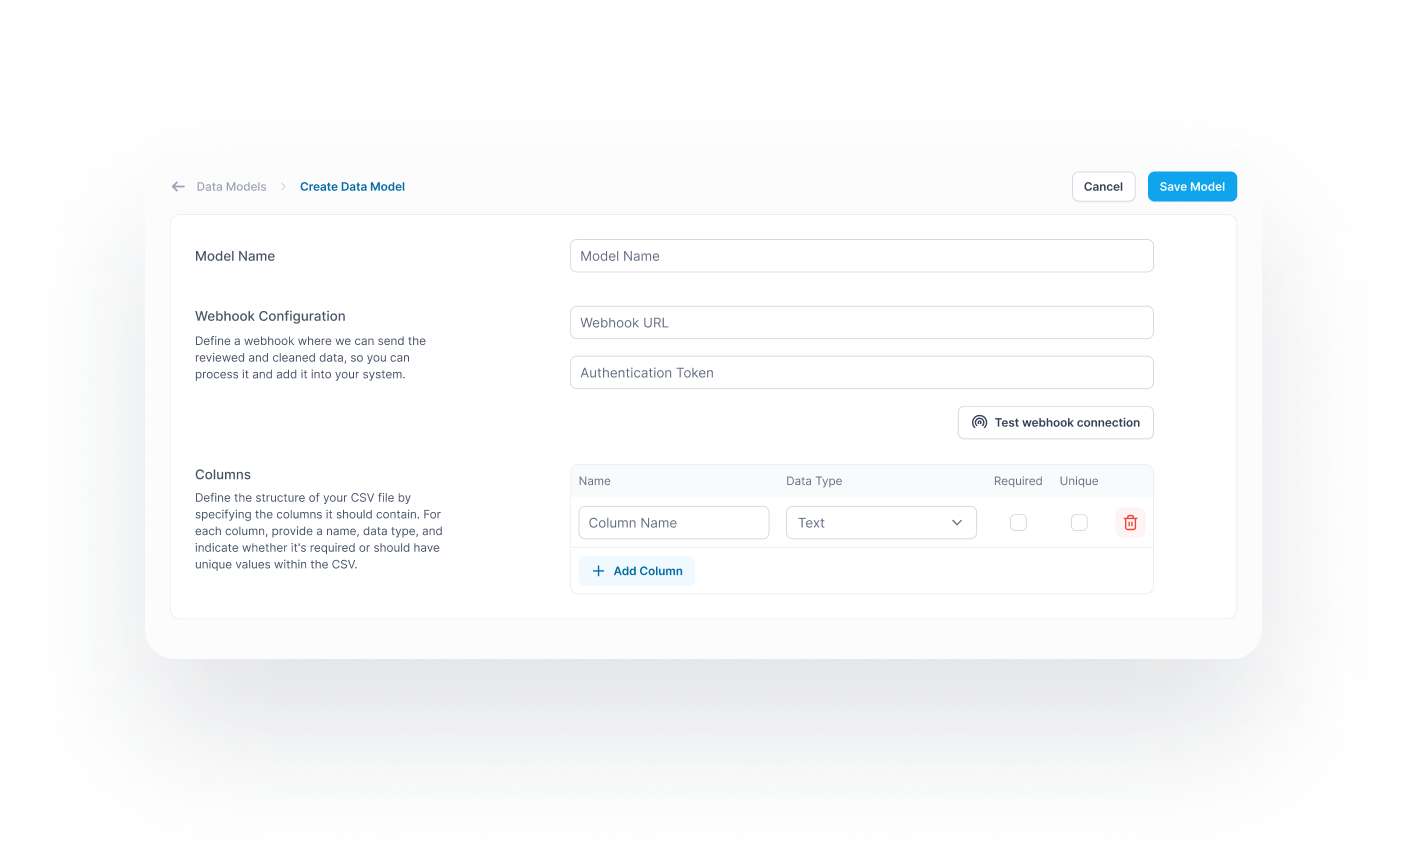
Setting up the Webhook URL #
One important part of the model is the webhook URL, this is used to send the clean data after the import process has been successful, your system can then use this data to process it further or store it in your application database.
The webhook URL is a required field, and it should be a valid URL that can receive a POST request. you can test its functionality by using the Test Webhook button. To know more about the JSON format that will be sent to the webhook, please refer to the JSON Format documentation.
Authenticated Webhooks #
If your webhook requires authentication, you can set the Authorization field to be contain the token that your system expects, this token will be sent as a Bearer token in the Authorization header.
Defining Columns and Data Types #
Within the model definition form, you will be able to define the columns and data types that will be used to organize and validate the data.
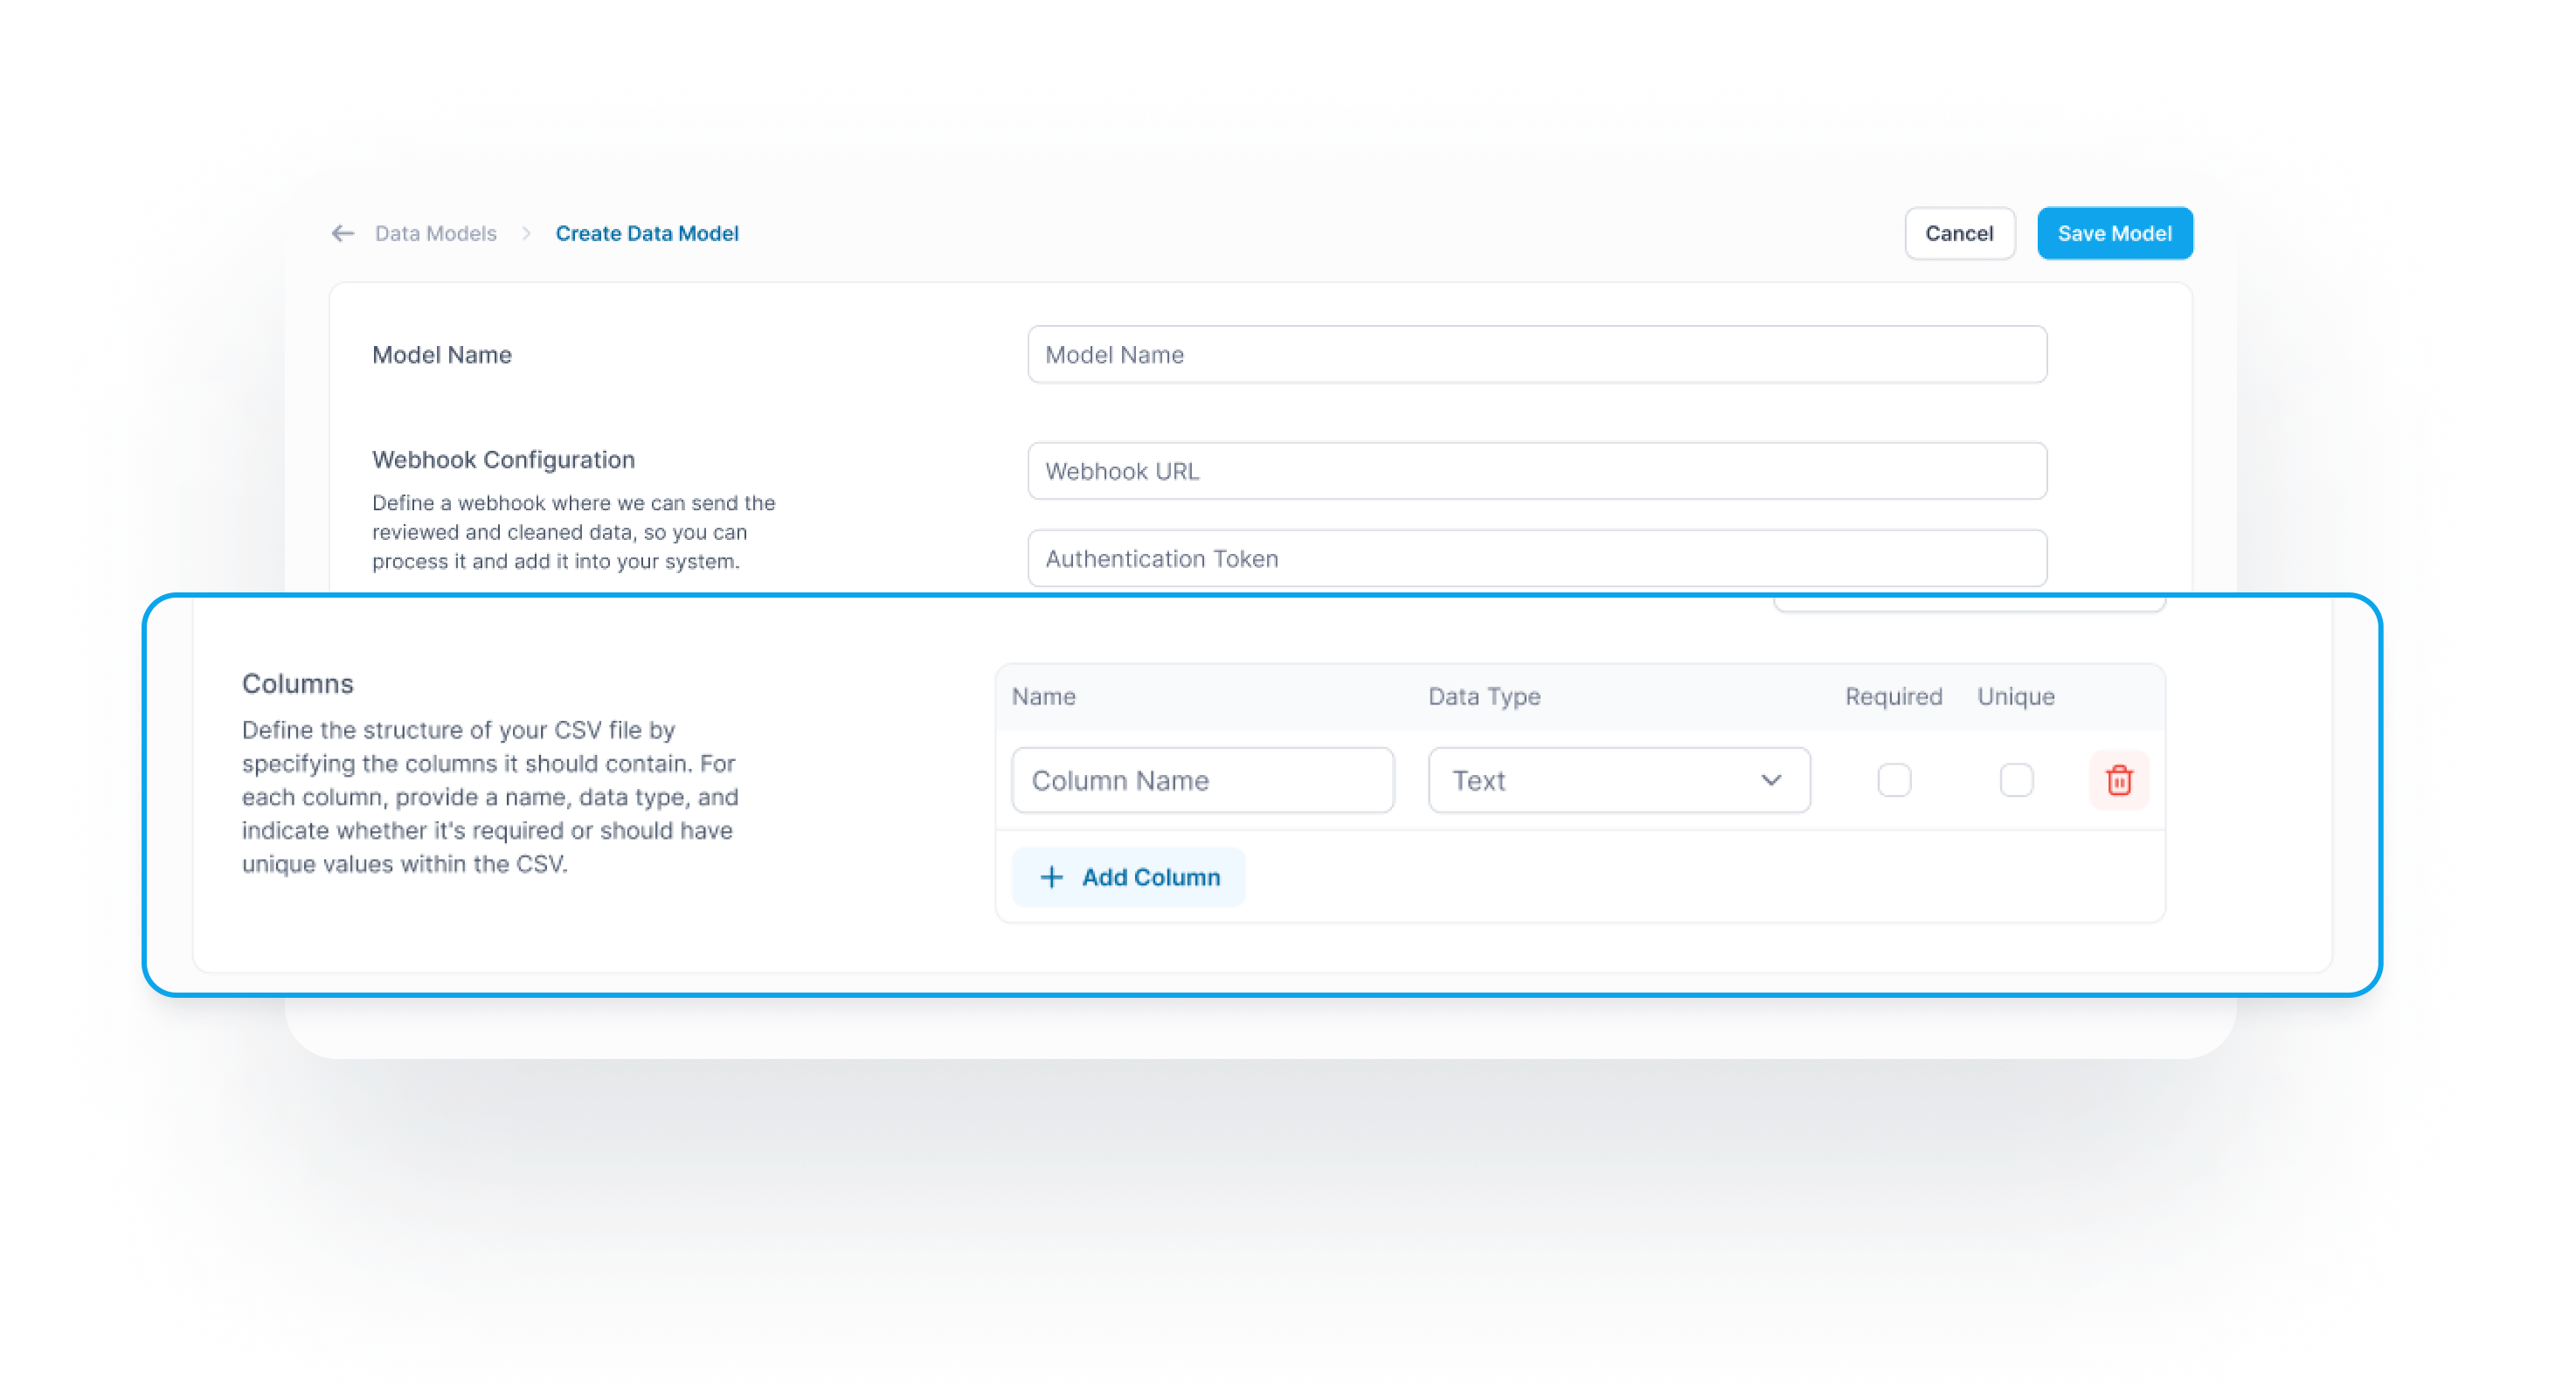
For each column:
- Column Name: Specify the name of the column.
- Data Type: Choose the appropriate data type (e.g., text, number, date).
- Required: Define if the field is required or not.
- Unique: Define if the field is unique or not.
Continue adding columns until your model accurately represents the desired data structure.
💡 Tips #
- Adopt a consistent and meaningful naming convention for models and columns.
- Use clear and concise names that reflect the purpose of each model and its associated columns.
- Select data types that align with the nature of the information each column represents.
- Ensure data types are compatible with the intended use of the imported data.